Sunday, May 8, 2011

Mother's Day

I decided to make a little book for my mom for Mother's Day. I got the idea of the book from Mary Green in her Collage Basics class. Aren't those letters for "MOM" cute"? They were on an advertisement for Mary Kay cosmetics that came in the mail.  Too pretty for the recycling bin. Anyhow, this is how the book started out:
You can buy these at the dollar store. It is a hard book with hard pages and it had the perfect amount of pages for what I needed. Next, I covered all the pages with scrap book paper. I actually put gesso on them first but I'm not sure if I needed to because I glued all the paper in and didn't end up doing any painted backgrounds. I covered the papers with photos of my sisters, my one brother and me. Then I decorated them with stamps, stickers and punched out paper. I used a doily as a stencil on a couple of them.  I also covered each page with a layer of matte gel medium. Then I put a little note on the back page.


I had my hand in my mouth a lot. I later replaced the hand with cake!

My youngest sister obviously came after the invention of color film.

Happy Mother's Day!
   

Sunday, April 24, 2011

I Got The Notion to Quilt

When I started this blog I said I was going to get back into sewing but that has not happened. I absolutely love working on collages. There is something really wonderful about cutting and gluing paper. Can't explain it. While I'm still not ready to make clothes, I am going to make this quilt I cut out a year ago. I love these fabrics by Robert Kaufman. This collection is called "You Got The Notions."
Now, if you are familiar with this collection you know it is several years old. I didn't discover it until well after it had come out. Not that it matters. I don't know if people say things like "Oh, that's so last year," with quilt fabric. Well, if those people were looking in my clothes closet they would be saying "Oh, that's so ten years ago." Anyway, I totally admire people that have a gorgeous quilt made five minutes after a new line comes out. I'll just justify my behindness on the fact that I am a beginner when it comes to quilting. That said, I am still taking way too long to get this made. Here is the pattern I am working off of.
It is a free pattern you can get on the Robert Kaufman website. Of course I bought way more fabric than I need to finish this because I thought this fabric could be used for tons of other ideas I had. At the moment I can't remember any of them but that's a problem for another day.  Here is what I made so far.
This wasn't exactly the easiest thing to cut out or sew for a beginner quilter since I had a lot of fussy cutting to do and I had to learn how to miter the corners of those fussy cut pieces. (See the zipper fabric on the top squares.) Well it feels good to sit at the sewing machine again and now that I have shown you that I am working on it, I will have to keep going so I don't look like a quilting loser. 

Definition of Fussy Cut: To fussy cut is to target and cut a specific motif that's printed on fabric, rather than randomly cutting yardage as we normally do. (From About.com)
   

Monday, April 18, 2011

Easter Bulletin Board

I completed my Easter bulletin board for my classroom. I enjoy doing these projects but they take about two weeks to do. I had the idea months ago and my students really got into it. First I photographed them doing what they thought they might do if they were hatching from an egg. Then I cut out the pictures.
Then I laid the picture on top of some colored card stock I purchased at Michaels. I then traced them to get the general outline of their shirt.

Then I would cut the neckline a little bit at a time and try it on top of the photo. I'm not saying that part is easy. It takes some patience and trial and error.  Then once I was happy with the shape I used colored pencils to draw some details. I looked at the shirt they were wearing and followed that to color on the folds of the shirt. Here is an example from another student's shirt.
Sometimes I needed to cut along the arms and hands that were on top of the shirt to trace the shirt. Here I cut across the line of her bracelet to avoid cutting around her hand on her leg. Notice I also had to cut around her hair to make it lay on top of the new shirt.


Next I cut their shoes off and made a pattern from them. I drew on some laces.
 
I glued the shirt on top of the photo and then I glued the photo down on white cardstock which was framed by the same colored cardstock I used for their clothes. I almost forgot to mention, the kids colored their own egg that they hatched from and then I tried to coordinate their clothes to go with their egg.
This was a fun project and the kids enjoyed being a part of its creation.

Saturday, April 9, 2011

April Collage Challenge

I must be weird! (Family need not respond) As soon as I printed the images for Mary's Collage Challenge, I immediately thought the birds should become hats on the girls' heads. Why? I don't know. Then, I actually worried that everyone would have the same idea. Why? Again, I don't know. But here is my entry as my mind saw it, weird or not.

Sunday, March 27, 2011

Getting my Creative Groove Back

Gosh, I went out of town for one week and since I got back I have had a hard time getting back into my creating. I still have some catching up to do from the end of my Artful Pages class and this week have been working on a new 
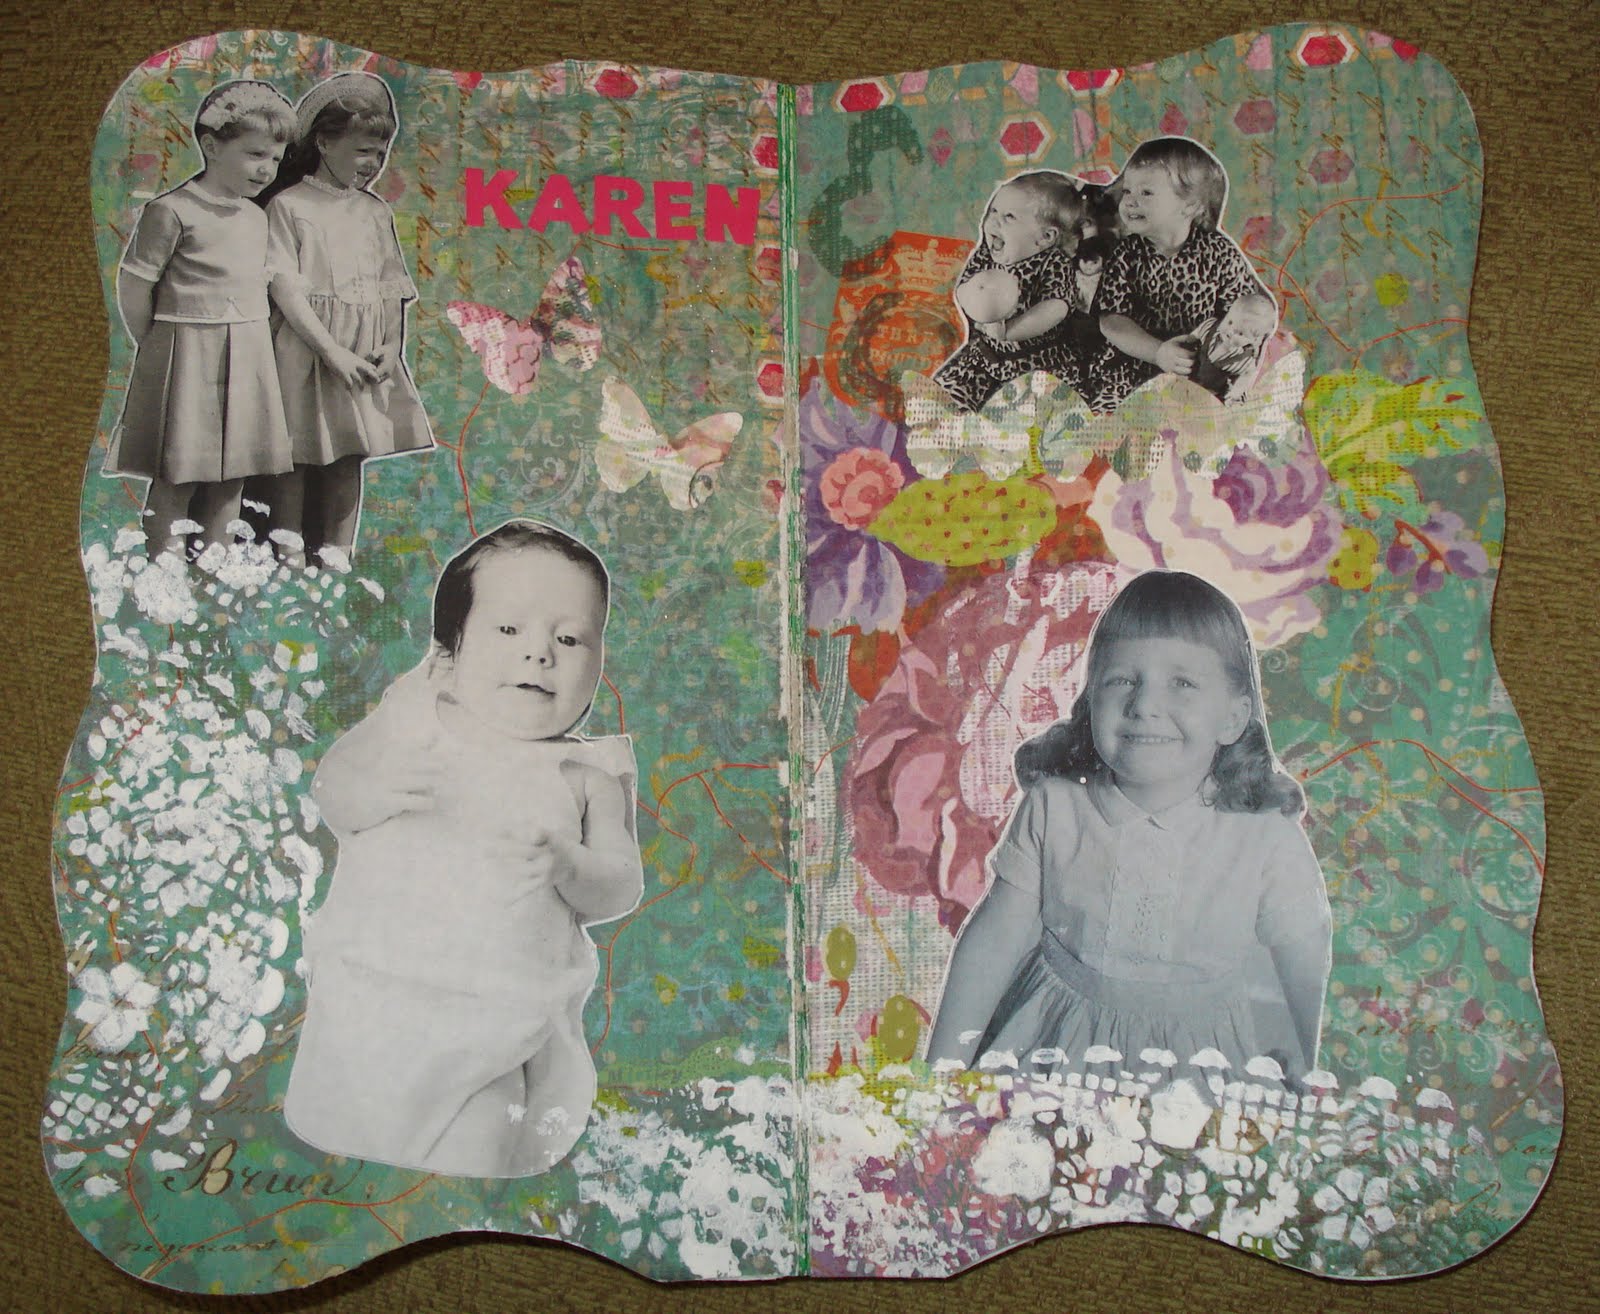
Collage Club assignment.  This one was about doing some layered backgrounds with vintage colors and patterns. While I was visiting my family in Pittsburgh I dug through more of my parent's old pictures. I have been using my digital camera to take photos of the photos so I could use them right away on my family tree on Ancestry.com. I'm enjoying using them in my collages too. This first one is using photos of my Great Aunt Genevieve. She was born in 1909 and later became a nurse in the army, serving during WWII .
Her parents were Frank and Rose Norwood and I added them to the next layered background. 
Before I went away I was working on an altered book. This was from a section of the Artful Pages class taught by Lenna Young Andrews. I bought this cute book from a thrift shop.
Next I cut out many of the pages so I would have room to add stuff.

Then I made some fun backgounds by painting them or gluing other paper on them. I don't really like my painted pages but I really like two of the pages I did with paper backgrounds. This first one was made by using strips I tore from the inside of security envelopes. You'd be surprised how many lovely patterns are inside those darn bills. At least they are good for something. Teehee! I added a picture of the house I grew up in and where my mom still lives. It looks much different now. I also love that song by Miranda Lambert "The House That Built Me."  I get a lump in my throat every time I hear it.

The other one I like was made by scanning a dress that my grandmother made and then printing it to make a pretty patterned paper. Of course I added pics of my grandmother and grandfather on top. I actually found a picture of her wearing the dress after I made this. That was cool to find. The quality of the picture isn't very good so I am not adding that.

Lots more projects to work on so I better get my groove back!

Wednesday, March 9, 2011

Whoo Whoo

Check out these adorable owls! Some of my sewing students made these cuties. I got the pattern from The DIY Dish and my girls had a blast making them.
Still loving my Artful Pages class! It is week 3 of 4 and this week I am learning how to make an altered book from Lenna Young Andrews. I'll show some of that soon but here is another page from my journal from week 2 with Hope Wallace Karney. It has places for hiding secrets. There is a pocket on the left and the little page in the middle is hiding secrets behind it. Don't you wish you read them?  Ha! This was fun to make!

Thursday, March 3, 2011

March Collage Challenge

It's the beginning of a new month which means another fun collage challenge from Mary at Green Paper. In case you forget, I have to create a piece of art using at least part of each of the three images that are provided. I used up a lot of printer ink trying to find the right background and ended up using a piece I already had. Argh! Oh well, hopefully the other backgrounds will be right for another project someday. I used the floral part of the holy card to decorate her dress and hat. I then used the names on the bank advertisement to make a plaque on the door of the office she is visiting. I also had to cut off the blade of her ice skates to give her regular boots. So here is my entry and you can check here to see what everyone else made. I can't wait to look now that I'm done!